An AI image to video workflow turns a still into motion, then adds the sound and text needed for a finished edit. In ChatCut, generate a first frame with Seedream 5.5, animate it with Kling 4.0 or Seedance 2.5, then add voiceover, captions and music before exporting.
The walkthrough below follows one coffee shot from its image prompt to a captioned MP4. Six paired examples also cover products, portraits, landscapes, interiors and illustrated characters, so you can choose a scene that fits your project.
Key Takeaways
- Generate and approve the still before animating it. Check the subject’s shape, framing and space for captions.
- Put the chosen image in First Frame and give the video model a focused motion instruction.
- Start with a short shot. The example video briefs use five seconds, with one main movement per shot.
- Add the narration, then select its audio track as the caption source.
- Budget for image, video and any generated audio. Open the exported file to check the finished picture, sound and captions.
How AI image to video works in ChatCut
There are two prompts to write. The image prompt establishes the subject, composition, lighting and style. The motion prompt directs the action, camera behavior and sound over time. Seedream 5.5 handles the still-image stage, and the selected video model handles animation. ByteDance describes Seedream 5.5 as an image creation model in its official announcement. Read the Seedream 5.5 announcement.
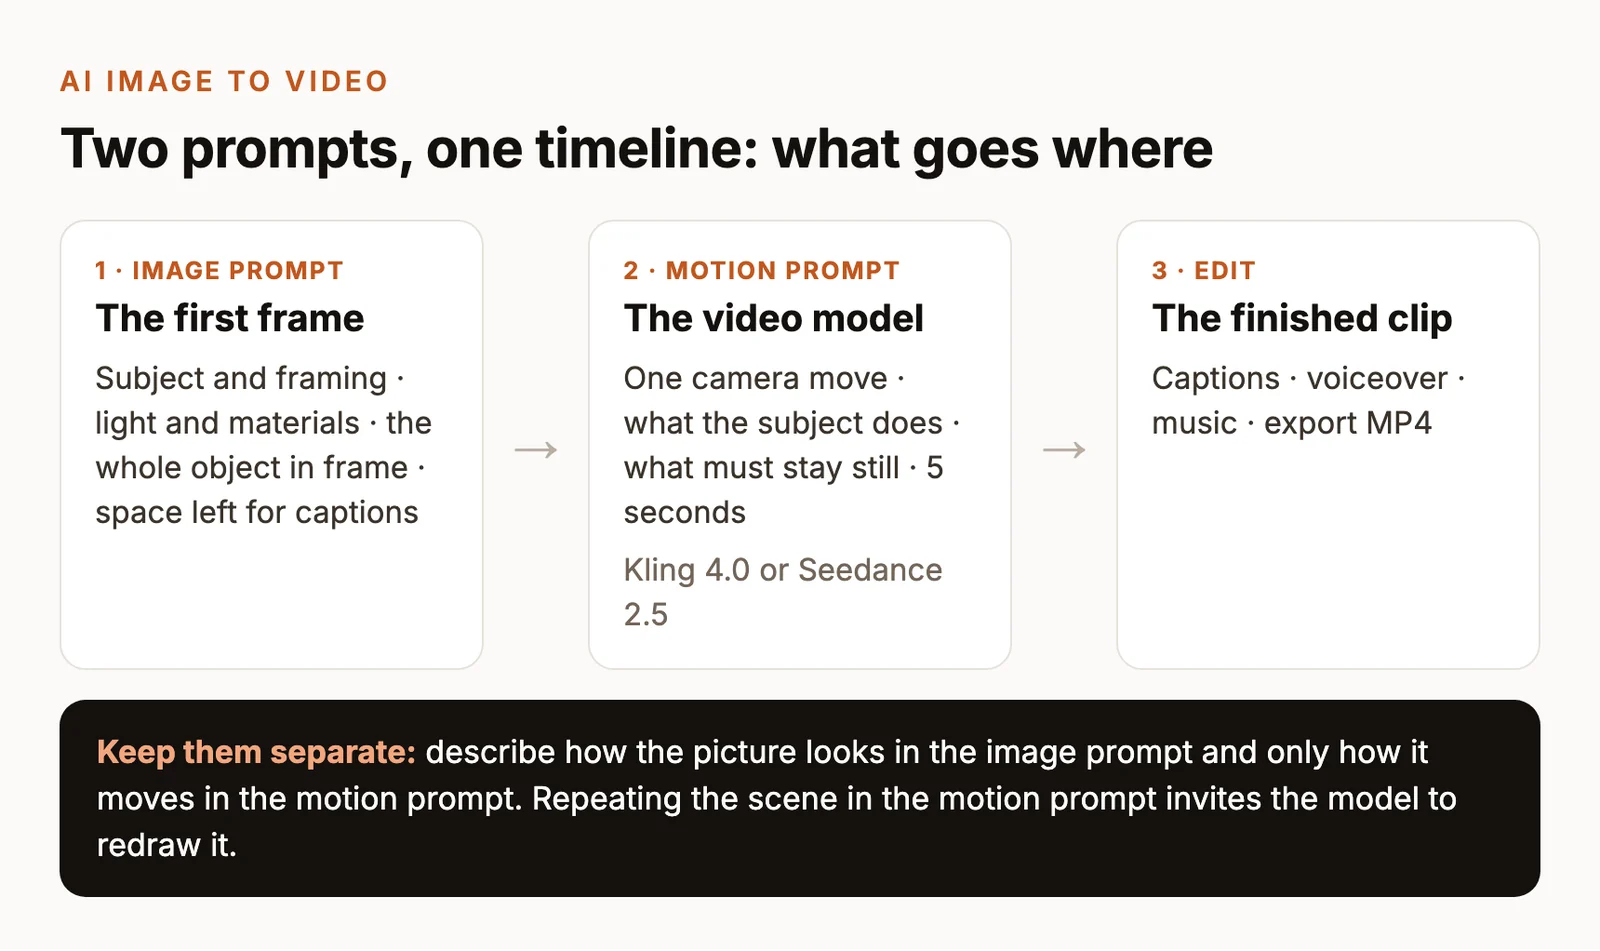
| Stage | Your input | What to approve |
|---|---|---|
| Create the first frame | Seedream 5.5 and an image prompt | Subject, clean edges, composition and caption space |
| Animate the image | First Frame, video model and motion prompt | Movement, identity, camera and generated sound |
| Assemble the shot | Generated video on the timeline | Framing, start, end and duration |
| Add voice and captions | Script, voice and narration track | Pronunciation, timing, caption words and placement |
| Add music and export | Music asset and export settings | Voice clarity, clean ending and playable MP4 |
You can follow this in ChatCut’s web editor or Desktop. For model background and image-only setup, see our Seedream 5.5 guide.
Image to video AI free options and generation costs
ChatCut’s image and video generation require a Pro plan and credits. AI voiceover and generated music also use credits. Check the estimate for each stage before generating. The documented requirements are in image generation, video generation, voiceover and music generation.
If you are looking for image to video AI free options, our free photo-to-video guide covers access routes, watermarks and usage conditions. Recheck the provider’s current allowance before starting. For the first-frame model’s access details, see Seedream free options.
Plan the cost of the still, motion take, narration and music together. Approve the image first, then change one motion instruction per retry so you can see what each take added. Reusing an existing voice recording or music asset removes the need to generate that asset again.
AI image to video tutorial in ChatCut
Step 1. Generate your first frame with Seedream 5.5
Open a project, keep the composer in Agent mode and request Seedream 5.5. Use the coffee image prompt in pair 1 below. If you want a particular product or person in the scene, attach a reference with +, or use Selection Mode and @ to refer to project media. Explain which details the reference supplies. Image generation instructions.
Pick Seedream 5.5 in the model menu, then review the available image settings and credit estimate before generating.
| Seedream 5.5 setting | Setup for this tutorial |
|---|---|
| Output size | Choose from the sizes shown for Seedream 5.5 before generating. |
| Aspect ratio | Choose an available ratio that fits your intended canvas; the prompts describe landscape or portrait compositions. |
| Background | Request a complete scene background in the prompt and review any background options shown before generating. |
| Credits per image | Review the credit estimate for your selected settings before submitting each generation. |
If a confirmation appears, review the request and estimate, then select Allow. Find the completed image in My Assets. Check the mug handle, table edges and empty caption area before continuing. When the still needs a revision, reference the latest image and name the detail to adjust.
For more starting scenes, use our Seedream 5.5 image prompts. You can also build first frames with GPT Image 2.6. The Seedream, Nano Banana and GPT Image comparison covers image-model selection.
Step 2. Hand the image to Kling 4.0 or Seedance 2.5
Switch to Video Gen, select the model name below the composer and choose Kling 4.0 or Seedance 2.5. Open Video settings → Input and use the frame inputs. Drag the approved image from My Assets into First Frame. For this single-image shot, use the first-frame input on its own. Video generation instructions.
| Video model | Controls relevant to this workflow | When to use the extra controls |
|---|---|---|
| Kling 4.0 | First-frame input, 720p or 1080p, native audio on every clip | Describe ambience in the motion prompt, then audition the generated sound |
| Seedance 2.5 | First-frame input, output up to 1080p, separate Edit video and Extend video modes | Choose Edit or Extend when working on an existing clip later |
These controls are documented in ChatCut’s model capability matrix.
For the coffee example, choose Kling 4.0, 5 seconds and 1080p, then paste pair 1’s motion prompt. With Kling frame inputs, the video framing follows the source image. Check the estimate and select Send message. Follow the original job in My Assets until it completes. Kling settings reference.
When changing models, recheck the First Frame slot and settings. Some attachments can be cleared by a model or mode switch. The generation references guide explains where each input belongs.
Step 3. Review the motion and place the clip on V1
Preview the generated clip before adding sound or captions. Scrub the opening, middle and ending. For the coffee shot, check whether the cup holds its shape while the steam moves, and listen for any generated speech or music.
Drag the selected video from My Assets onto V1 at the beginning of the timeline. Remove any temporary still occupying that shot’s time range. Trim the clip to the section you want to keep and check that its framing fits the canvas.
If the cup changes shape, return to the same first frame and simplify the movement for another take. Keep the model, image, duration and resolution fixed while revising one motion clause. For more camera and subject variations, use our image-to-video motion prompts.
Step 4. Add a short voiceover
Return to Agent, select + → Voices and preview a voice. Choose its name or Use, then send the script and placement request. The generated audio appears in My Assets and can be dragged to A1 if needed. Voiceover instructions.
Listen to the actual narration length. If it runs beyond the shot, shorten the line or adjust the edit before adding captions. Audition the video’s generated audio alongside it, and lower or mute that audio when it competes with the voice.
Step 5. Create captions from the narration
Open Transcript and select A1 as the source. Wait for transcription, check the words, then turn on Captions in the playback controls. Open the adjacent chevron to preview and choose a caption style. Transcript and Captions instructions.
Preview the captions over the actual shot at a phone-sized viewing scale. Correct spelling through the caption Content controls, and check each cue’s placement and timing. Select the narration track explicitly when the generated video also contains speech.
Step 6. Add music and balance the mix
Use a suitable music asset already in your project, or generate an instrumental cue with a clear brief. Specify its mood, instruments and placement. Music generation instructions.
Check the music asset in My Assets and its position on the timeline. Adjust its volume while listening to the voice, then audition the whole mix on headphones and a phone speaker. Trim and fade the actual audio to fit the picture.
Step 7. Export and play the finished file
Select the finished timeline and open Export → Video. For this walkthrough, choose H.264/MP4, 1080p, the intended frame rate and the full timeline range. Keep captions visible and follow the export queue. Keep the project tab open during browser rendering, or Desktop open during its local render. Export instructions.
Visible captions are included in the exported picture. For a separate subtitle file, wait for transcription to finish, then use Export → Subtitles → SubRip (.srt). Export itself consumes no ChatCut credits, with plan permissions and cloud quotas applying to the available route. Video and subtitle export reference.
Open the saved MP4 and check the following.
- The first and last frames are intentional, with no gap after the picture.
- The narration finishes within the edit and stays clear above the music.
- Captions match the speech and remain readable over the moving background.
- The file plays with sound and has the intended orientation.
Make a matching cover image
For a cover that matches the coffee clip, use this image brief with Seedream 5.5 and review the available settings as described in step 1. Add any title as editable text in your design or edit.
The cover example, generated with GPT Image 2.6, shows curling steam above a cream mug with its full handle visible, while golden window light crosses the walnut table against a deep teal wall.
6 AI image to video prompt pairs
Use the image prompt with Seedream 5.5, approve the still, then use the motion prompt with that image as First Frame. All six pairs provide example first-frame artwork and motion recipes to try; completed video examples are not included here. The displayed artwork was generated with GPT Image 2.6 using the same image prompts. Seedream 5.5 results will be added. Review the available image size, ratio and credit estimate before generating your own first frame.
Keep the image and motion instructions focused on their respective stages. Runway’s image-to-video guide also explains how a starting image supplies the composition and appearance while text directs movement. Runway prompting guide.
| Pair | Use | Requested framing | Main motion |
|---|---|---|---|
| 1 | Coffee opening | 16:9 | Rising steam |
| 2 | Product teaser | 16:9 | Small camera push-in |
| 3 | Portrait short | 9:16 | A natural blink |
| 4 | Landscape B-roll | 16:9 | Lake ripples |
| 5 | Interior atmosphere | 16:9 | Curtain movement |
| 6 | Character greeting | 9:16 | A small wave |
Pair 1. Coffee steam
Use this pair for the walkthrough above. The mug gives you a clear shape to inspect, and steam supplies a small environmental movement.
Image prompt
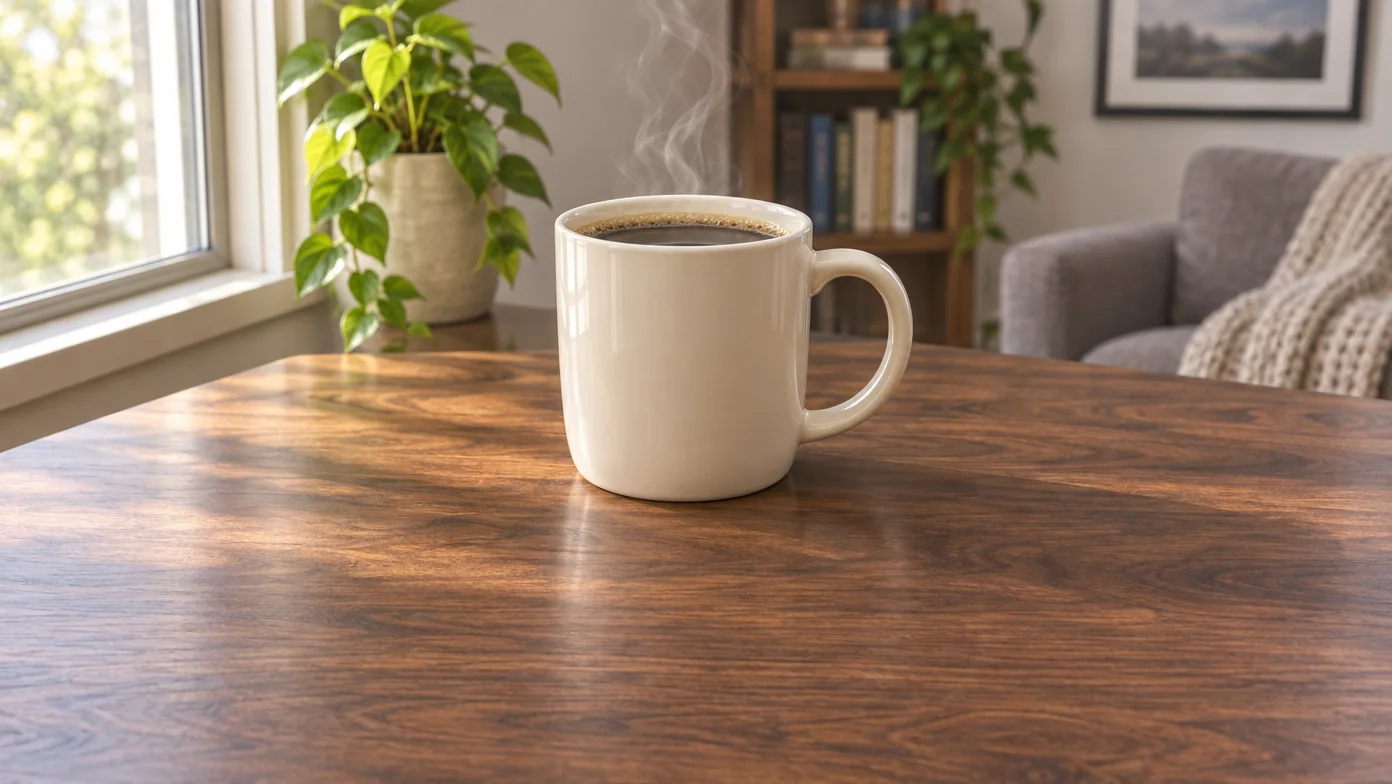
In this example, the full mug and right-side handle are visible, thin steam rises above the rim, and the lower foreground is an open area of walnut tabletop for captions.
Motion prompt
Check the take by scrubbing the handle and rim while the steam moves. Listen for any sound you need to lower before adding narration.
Pair 2. A product push-in
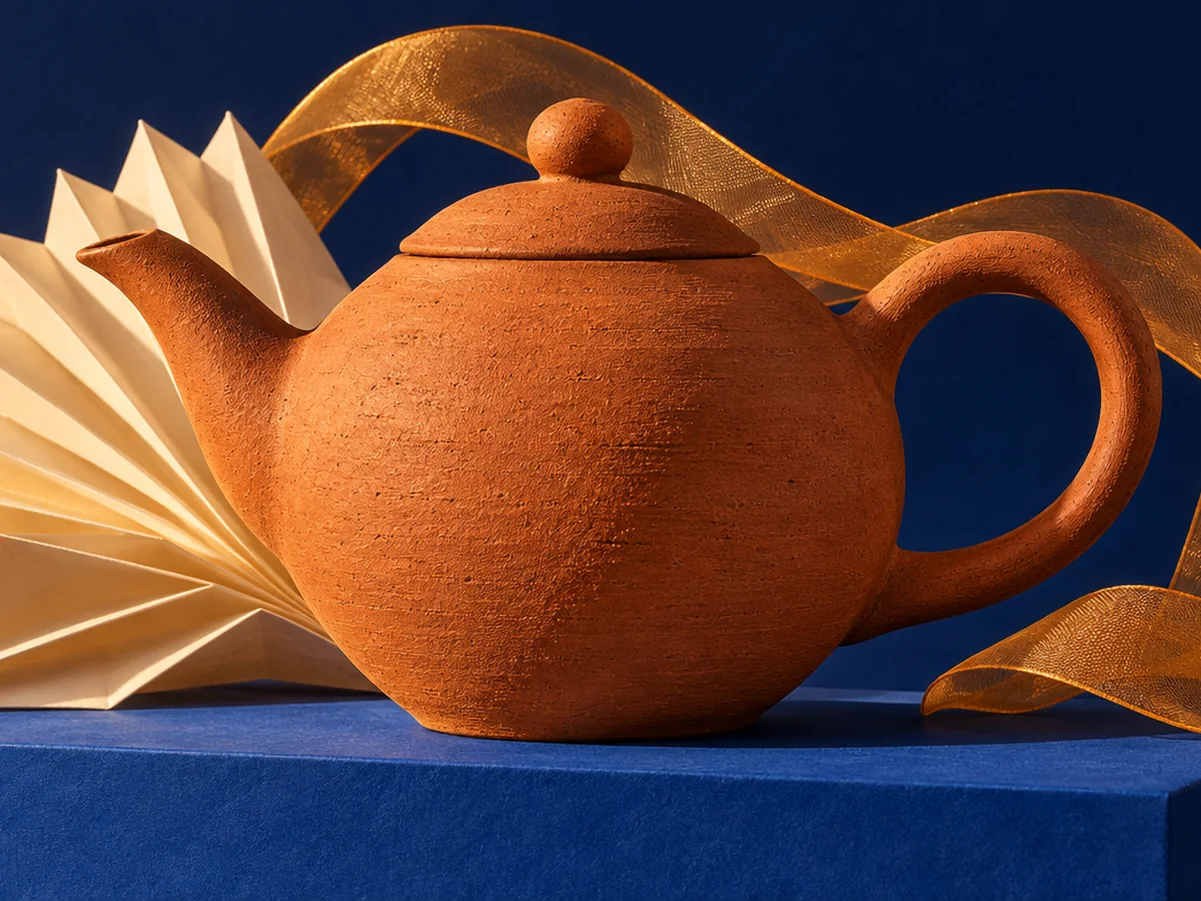
Use this for a product teaser. For a real item, attach your product photo and ask the image model to preserve its identifying details.
Image prompt
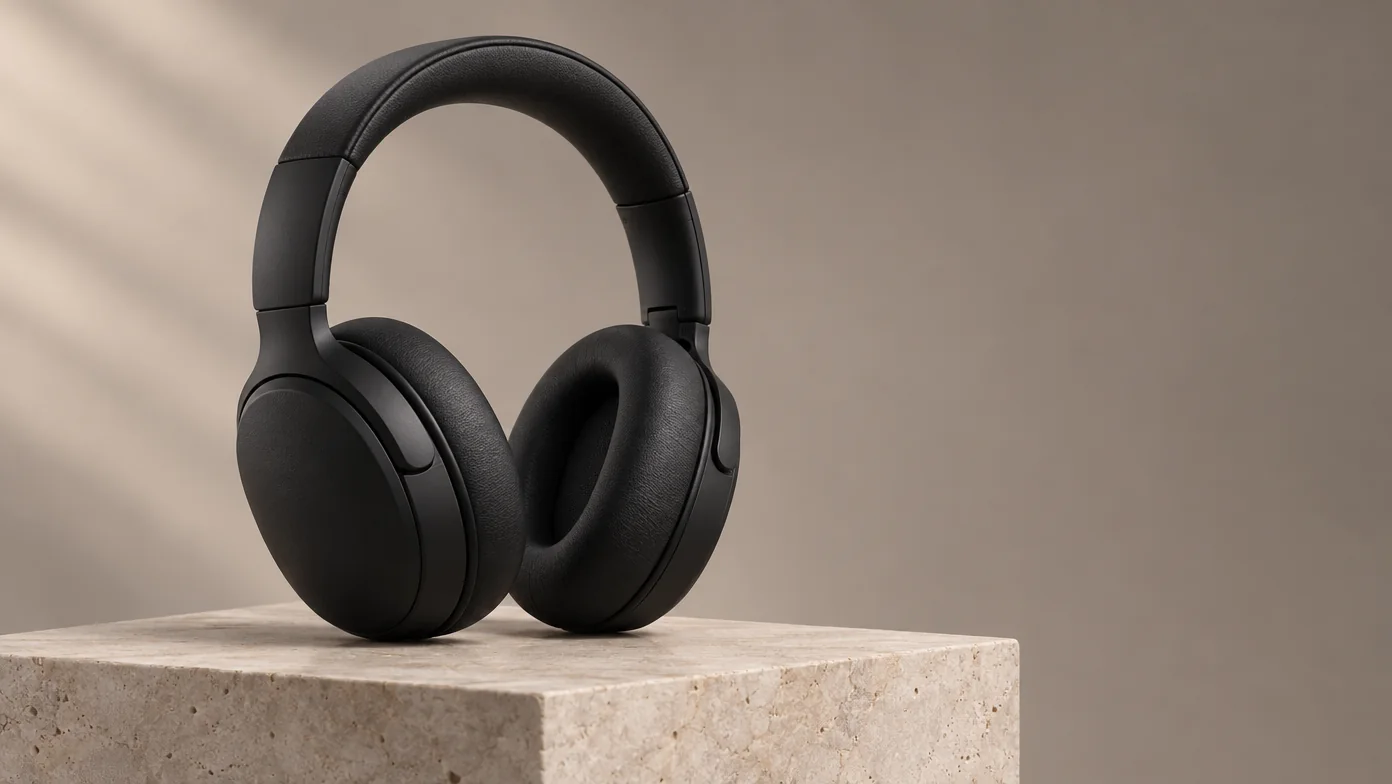
In this example, both earcups and the complete padded headband are visible on the pale stone plinth, with broad empty gray space to the right for a title.
Motion prompt
Check the take by following the headband and earcups through the push-in. Reduce the camera travel if the product’s proportions drift.
Pair 3. A portrait blink
Use this for a vertical portrait moment, with narration added on an audio track afterward.
Image prompt
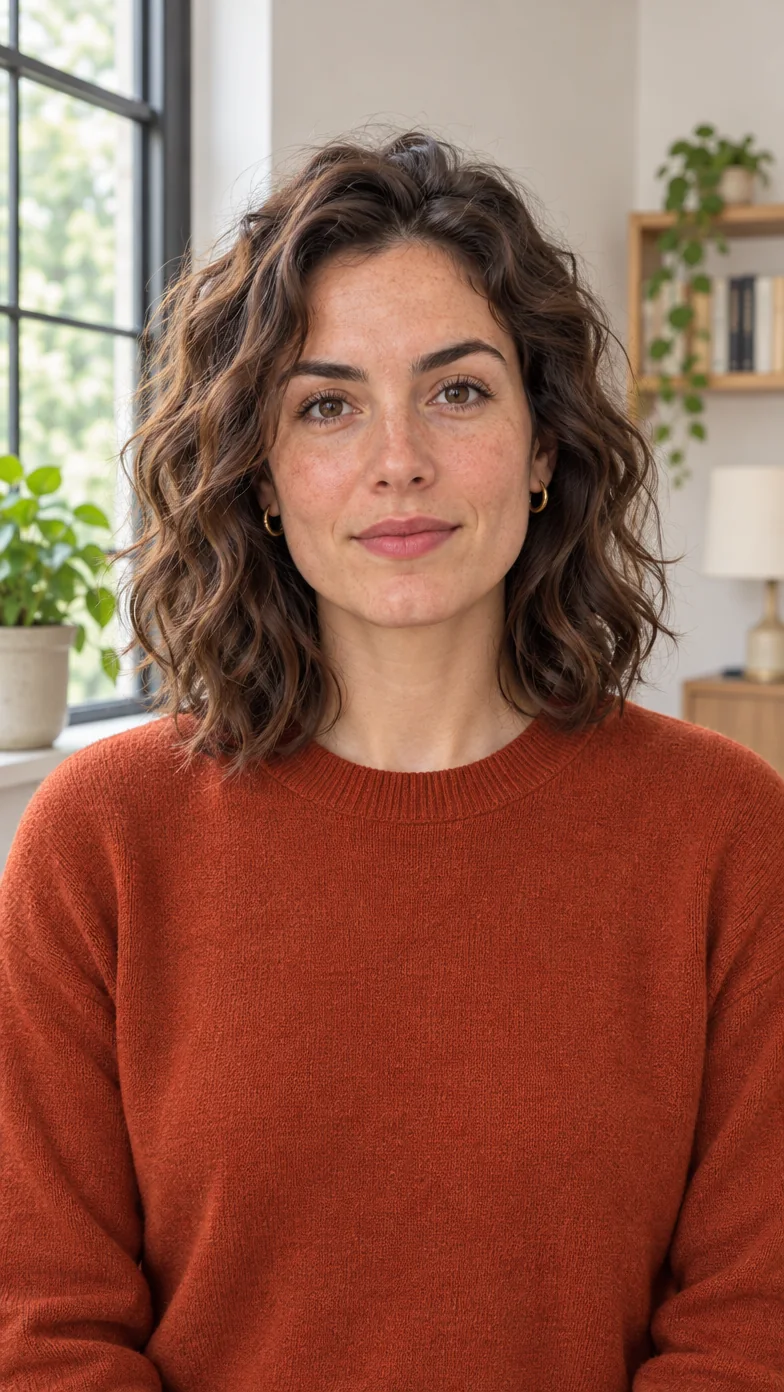
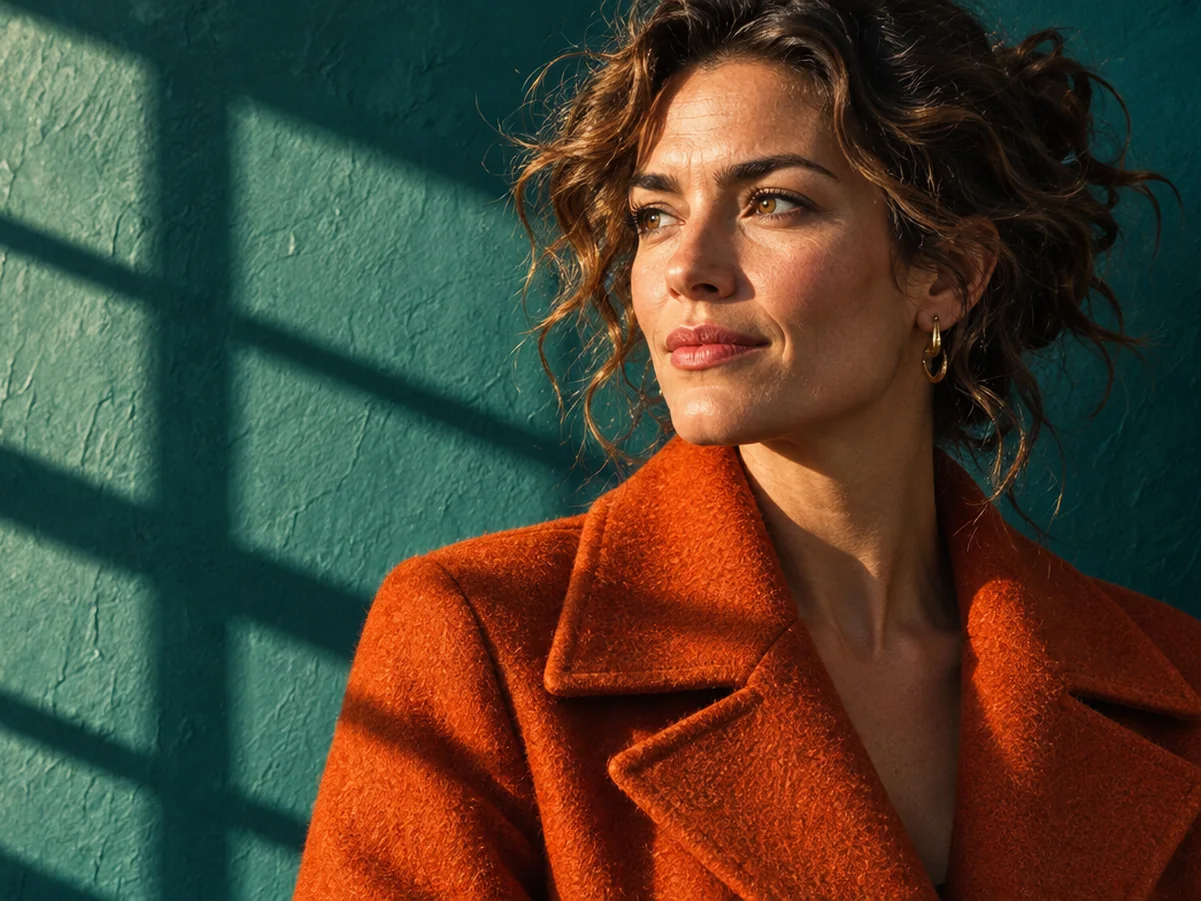
In this example, both eyes are open and the mouth is closed, with the full head visible and a broad area of plain rust-colored sweater below the shoulders for captions.
Motion prompt
Check the take by comparing the eyes and mouth before and after the blink, then checking the face outline through the whole shot.
Pair 4. Lake ripples
Use this for landscape B-roll under a voiceover. The jetty provides a straight edge against which to check the animation.
Image prompt
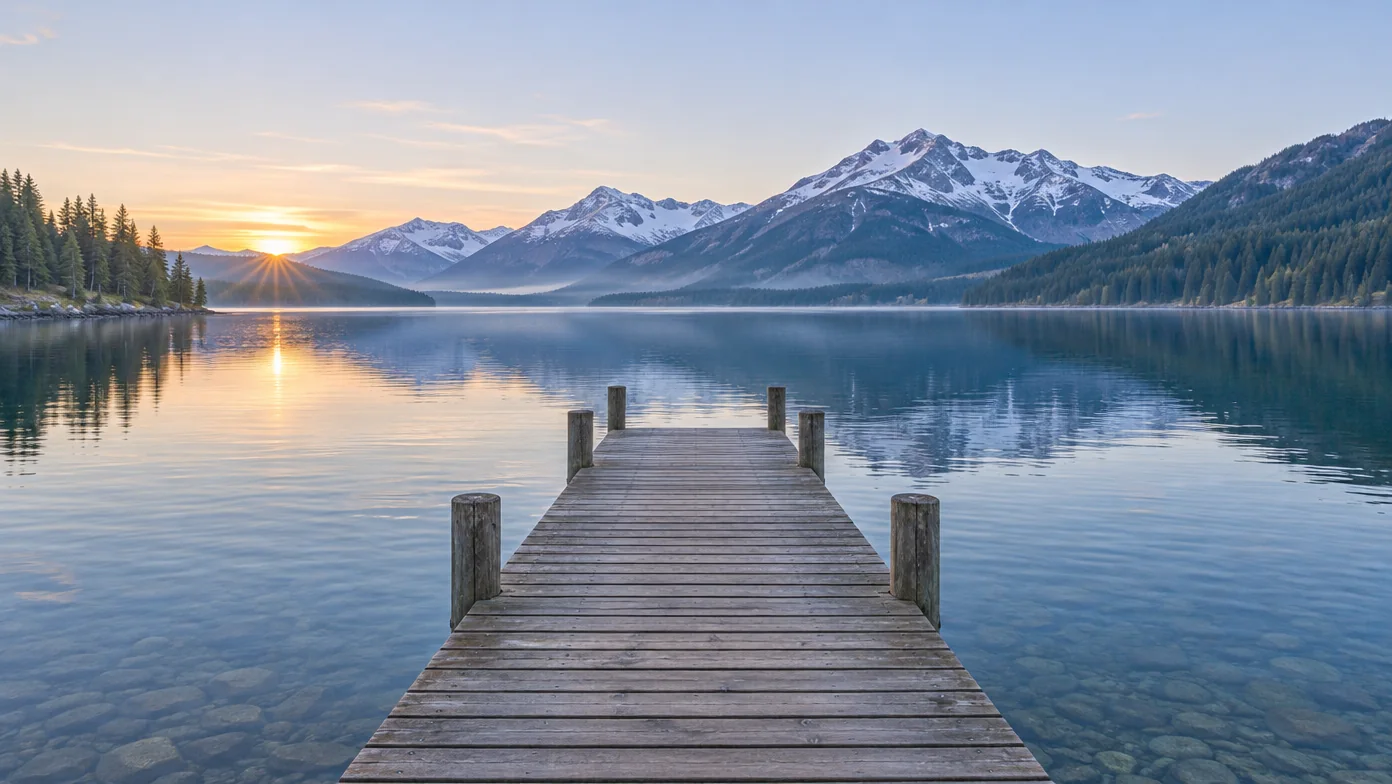
In this example, the jetty boards form straight lines toward the mountains, while fine ripples interrupt the lake reflection and submerged stones remain visible in the foreground.
Motion prompt
Check your take for bending jetty boards or a changing mountain outline. Try the water movement with a locked camera first.
Pair 5. A curtain in a breeze
Use this to add atmosphere to an interior scene. Give the fabric enough space in the first frame for the planned movement.
Image prompt
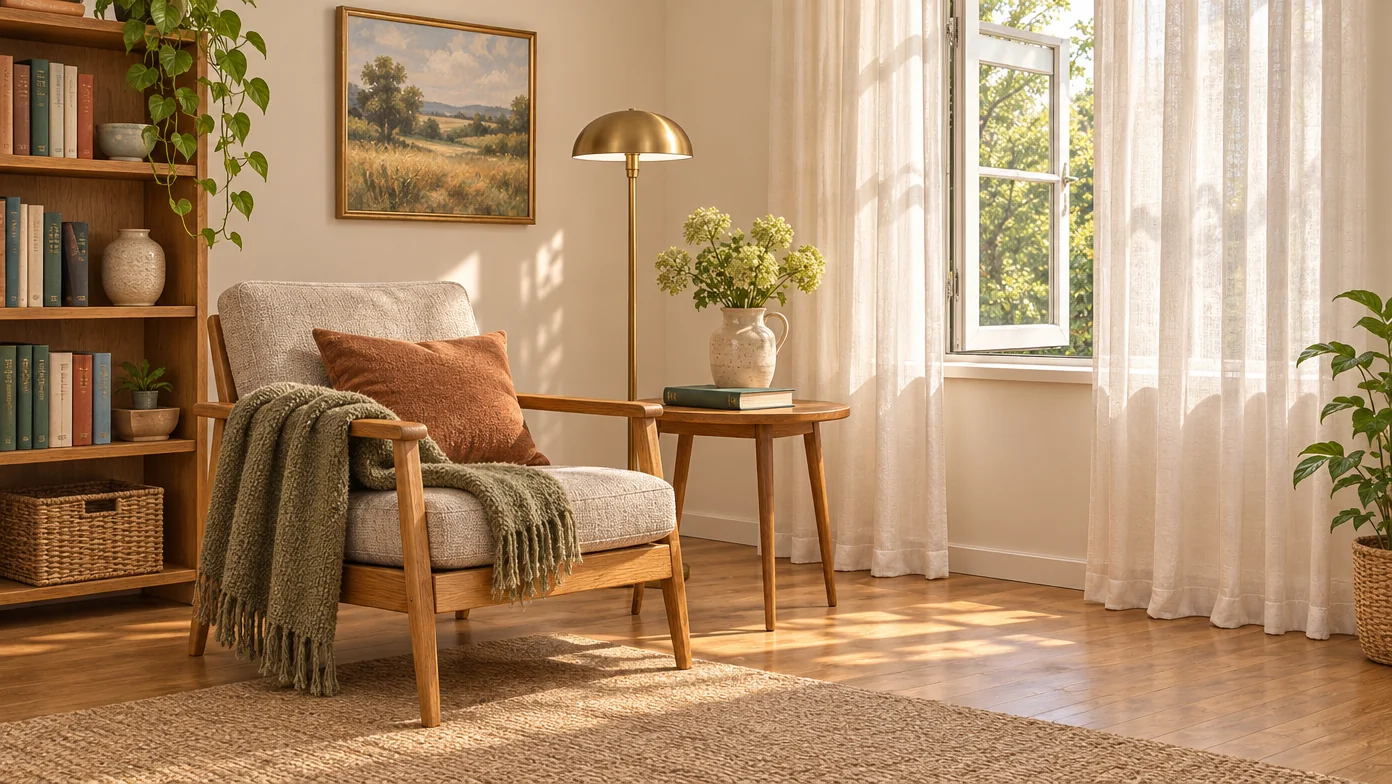
In this example, the sheer curtain hems and folds are visible beside the open window, with sunlit floor space to the right of the chair and a closed book beneath the vase on the side table.
Motion prompt
Check your take at the window edges and table legs. If they bend with the fabric, reduce the curtain’s movement in the next prompt.
Pair 6. An illustrated robot wave
Use this for a character greeting. A raised arm in the still gives the wave a defined starting pose.
Image prompt
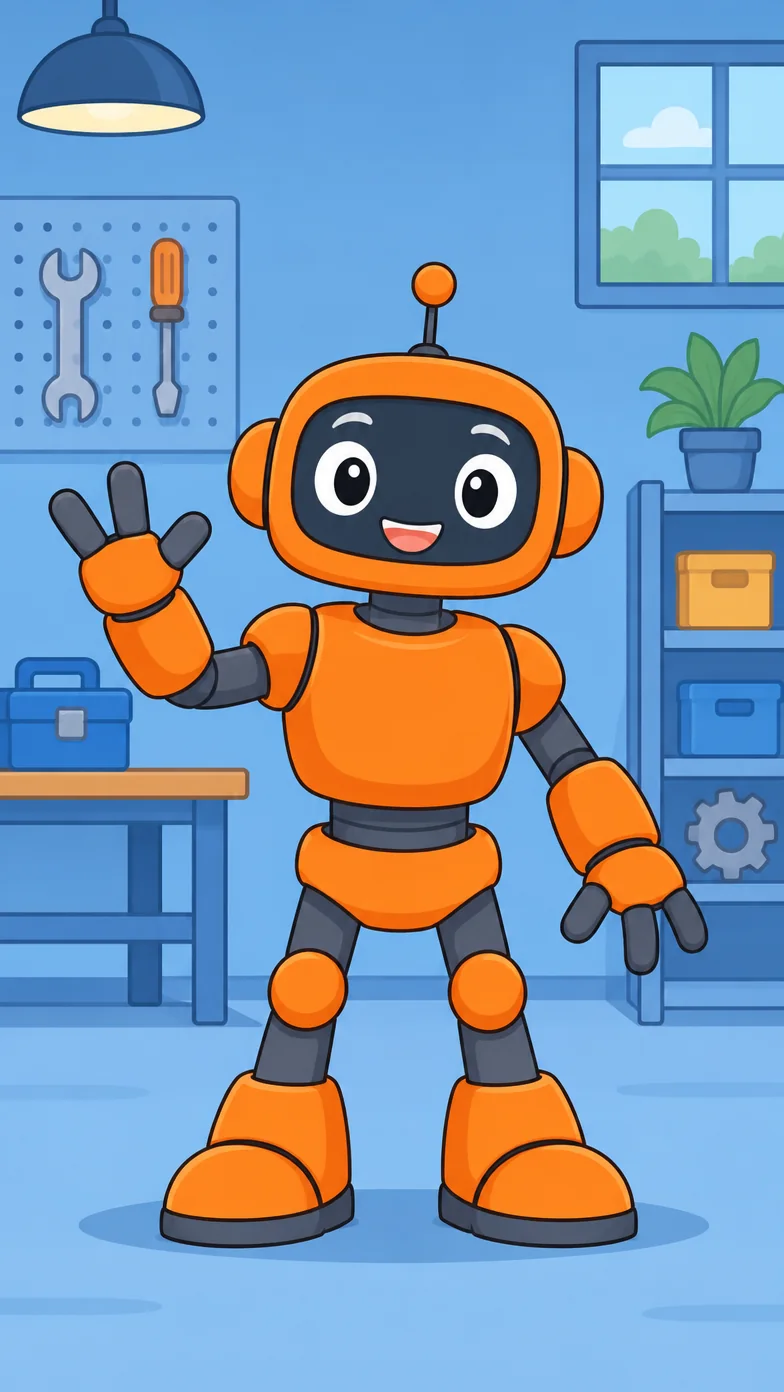
In this example, the orange robot is visible from antenna to feet, with one hand raised and three separated fingers on each hand against the blue workshop background.
Motion prompt
Check your take for finger count, clean outlines and a steady body silhouette throughout the wave.
Fix common image to video AI problems
| What you see or hear | Next change to try |
|---|---|
| A face or product changes shape | Inspect the source still, then reduce the movement to a blink, ripple or shallow push-in |
| The camera reveals an invented background | Ask for a smaller camera move and keep it within the original composition |
| A logo or title warps | Use a clean first frame and add the lettering as an editable layer over the finished clip |
| The shot is nearly frozen | Name one visible action, its direction and speed |
| Captions are missing or contain the wrong speech | Select the narration track and wait for its transcription |
| The voice extends beyond the shot | Shorten the script, assemble additional shots or use a supported extension workflow |
| Music competes with narration | Audition generated video audio, narration and music separately, then adjust the mix |
For a deeper library of camera and subject movements, continue with image-to-video prompts. For a longer sequence assembled from new shots, our AI video prompts guide supplies additional scene briefs.